


Cad rivet heads and bare sprocket

Add a little Secret Faux Parkerize

Cheating

Once it's all together no one's the wiser...

Back together with touch ups and screws
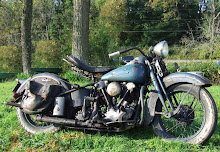
I finally got up the nerve to put the three Parkerized screws in the rear fender. I left the three factory holes for the seat yoke bracket in the fender for authenticity...I just couldn't get myself to test the paint by inserting and tightening the screws. Mark form Twisted Customs (who painted it) always assured me it would be fine...I am just not used to shiny painted stuff...
Well I pulled off the rear wheel to get the job done proper like. It all worked out fine as Mark said. While the wheel was off I took the opportunity to fix up a couple other things that have been bugging me. The cad rivet heads and bare metal (new) sprocket that my buddy had installed with a rivet press 10 years ago. That was before I realized that I would care about the shape or finish of a rivet head on a sprocket! Damn shiny bikes...
So I used a trick I picked up to cheat with Parkerizing. Gun Coat. It really calls for heating during application but for stuff like this I find brushing it on at room temp works OK. It's a little bluer then Parkerize but its the closest thing I've found to cheat with. You don't want to use it on anything that stands right out unless you don't care and just need a metal finish. I've used it the proper way heating and coating and it works good.
I also touched up some areas of the frame with black enamel and swapped out a couple of painted bolts with Parkerized ones...what the hell is happening to me???????
I gotta get on the "Dirty Nine" and take a filthy oil spewing, smoke belching ride to the Tavern!


No comments:
Post a Comment